How to write a notebook for Times Square
If you know how to create a Jupyter notebook, publishing a notebook to Times Square will be familiar. This page outlines the basic steps for adding and authoring a notebook for Times Square, and links to further documentation.
1. Setting up on the Science Platform Notebook Aspect
Although it’s not strictly necessary, the best place to create and edit notebooks for Times Square is from the Rubin Science Platform’s Notebook Aspect. If the notebook runs from your interactive session, it will run on Times Square (provided it doesn’t use user-specific software or data, see Notebooks can’t reference files or code installed in a specific user’s home directory).
For details on getting started, see start a JupyterLab session on the Notebook Aspect.
2. Work in a GitHub repository checkout
Times Square runs notebooks from GitHub repositories, so you’ll need to author your notebook in a checkout of a repository in JupyterLab. From a JupyterLab terminal, clone a GitHub repository that’s already installed on Times Square, and navigate into the repository.
Make sure you’ve set up GitHub access in your JupyterLab environment (see Configuring Git and GitHub access). You’ll “publish” your notebook to Times Square by pushing it to GitHub.
Tip
To see what repositories are available on Times Square, visit the Times Square homepage. The sidebar shows what repositories already host notebooks.
If an existing repository doesn’t fit your needs, you can create a new repository on GitHub and set it up for Times Square. See Managing GitHub repositories for more information.
3. Create a new notebook
Create a new notebook and save it into the repository you cloned above:
From the JupyterLab Launcher, create a new notebook with the “LSST” kernel.
Save the notebook into the repository you cloned above. Select and set the notebook’s path and name.
Make sure the path is within the repository. You can also save the notebook into a subdirectory of the repository. The directory hierarchy is reflected in the Times Square interface, so it’s a useful tool for organizing notebooks.

The “Save Notebook As…” dialog box. The path is set to the repository cloned above.
4. Scaffold the notebook cells
Times Square uses the first code cell in the notebook for setting parameters. It’s useful to mark this cell with a comment so that you don’t forget about its special role.
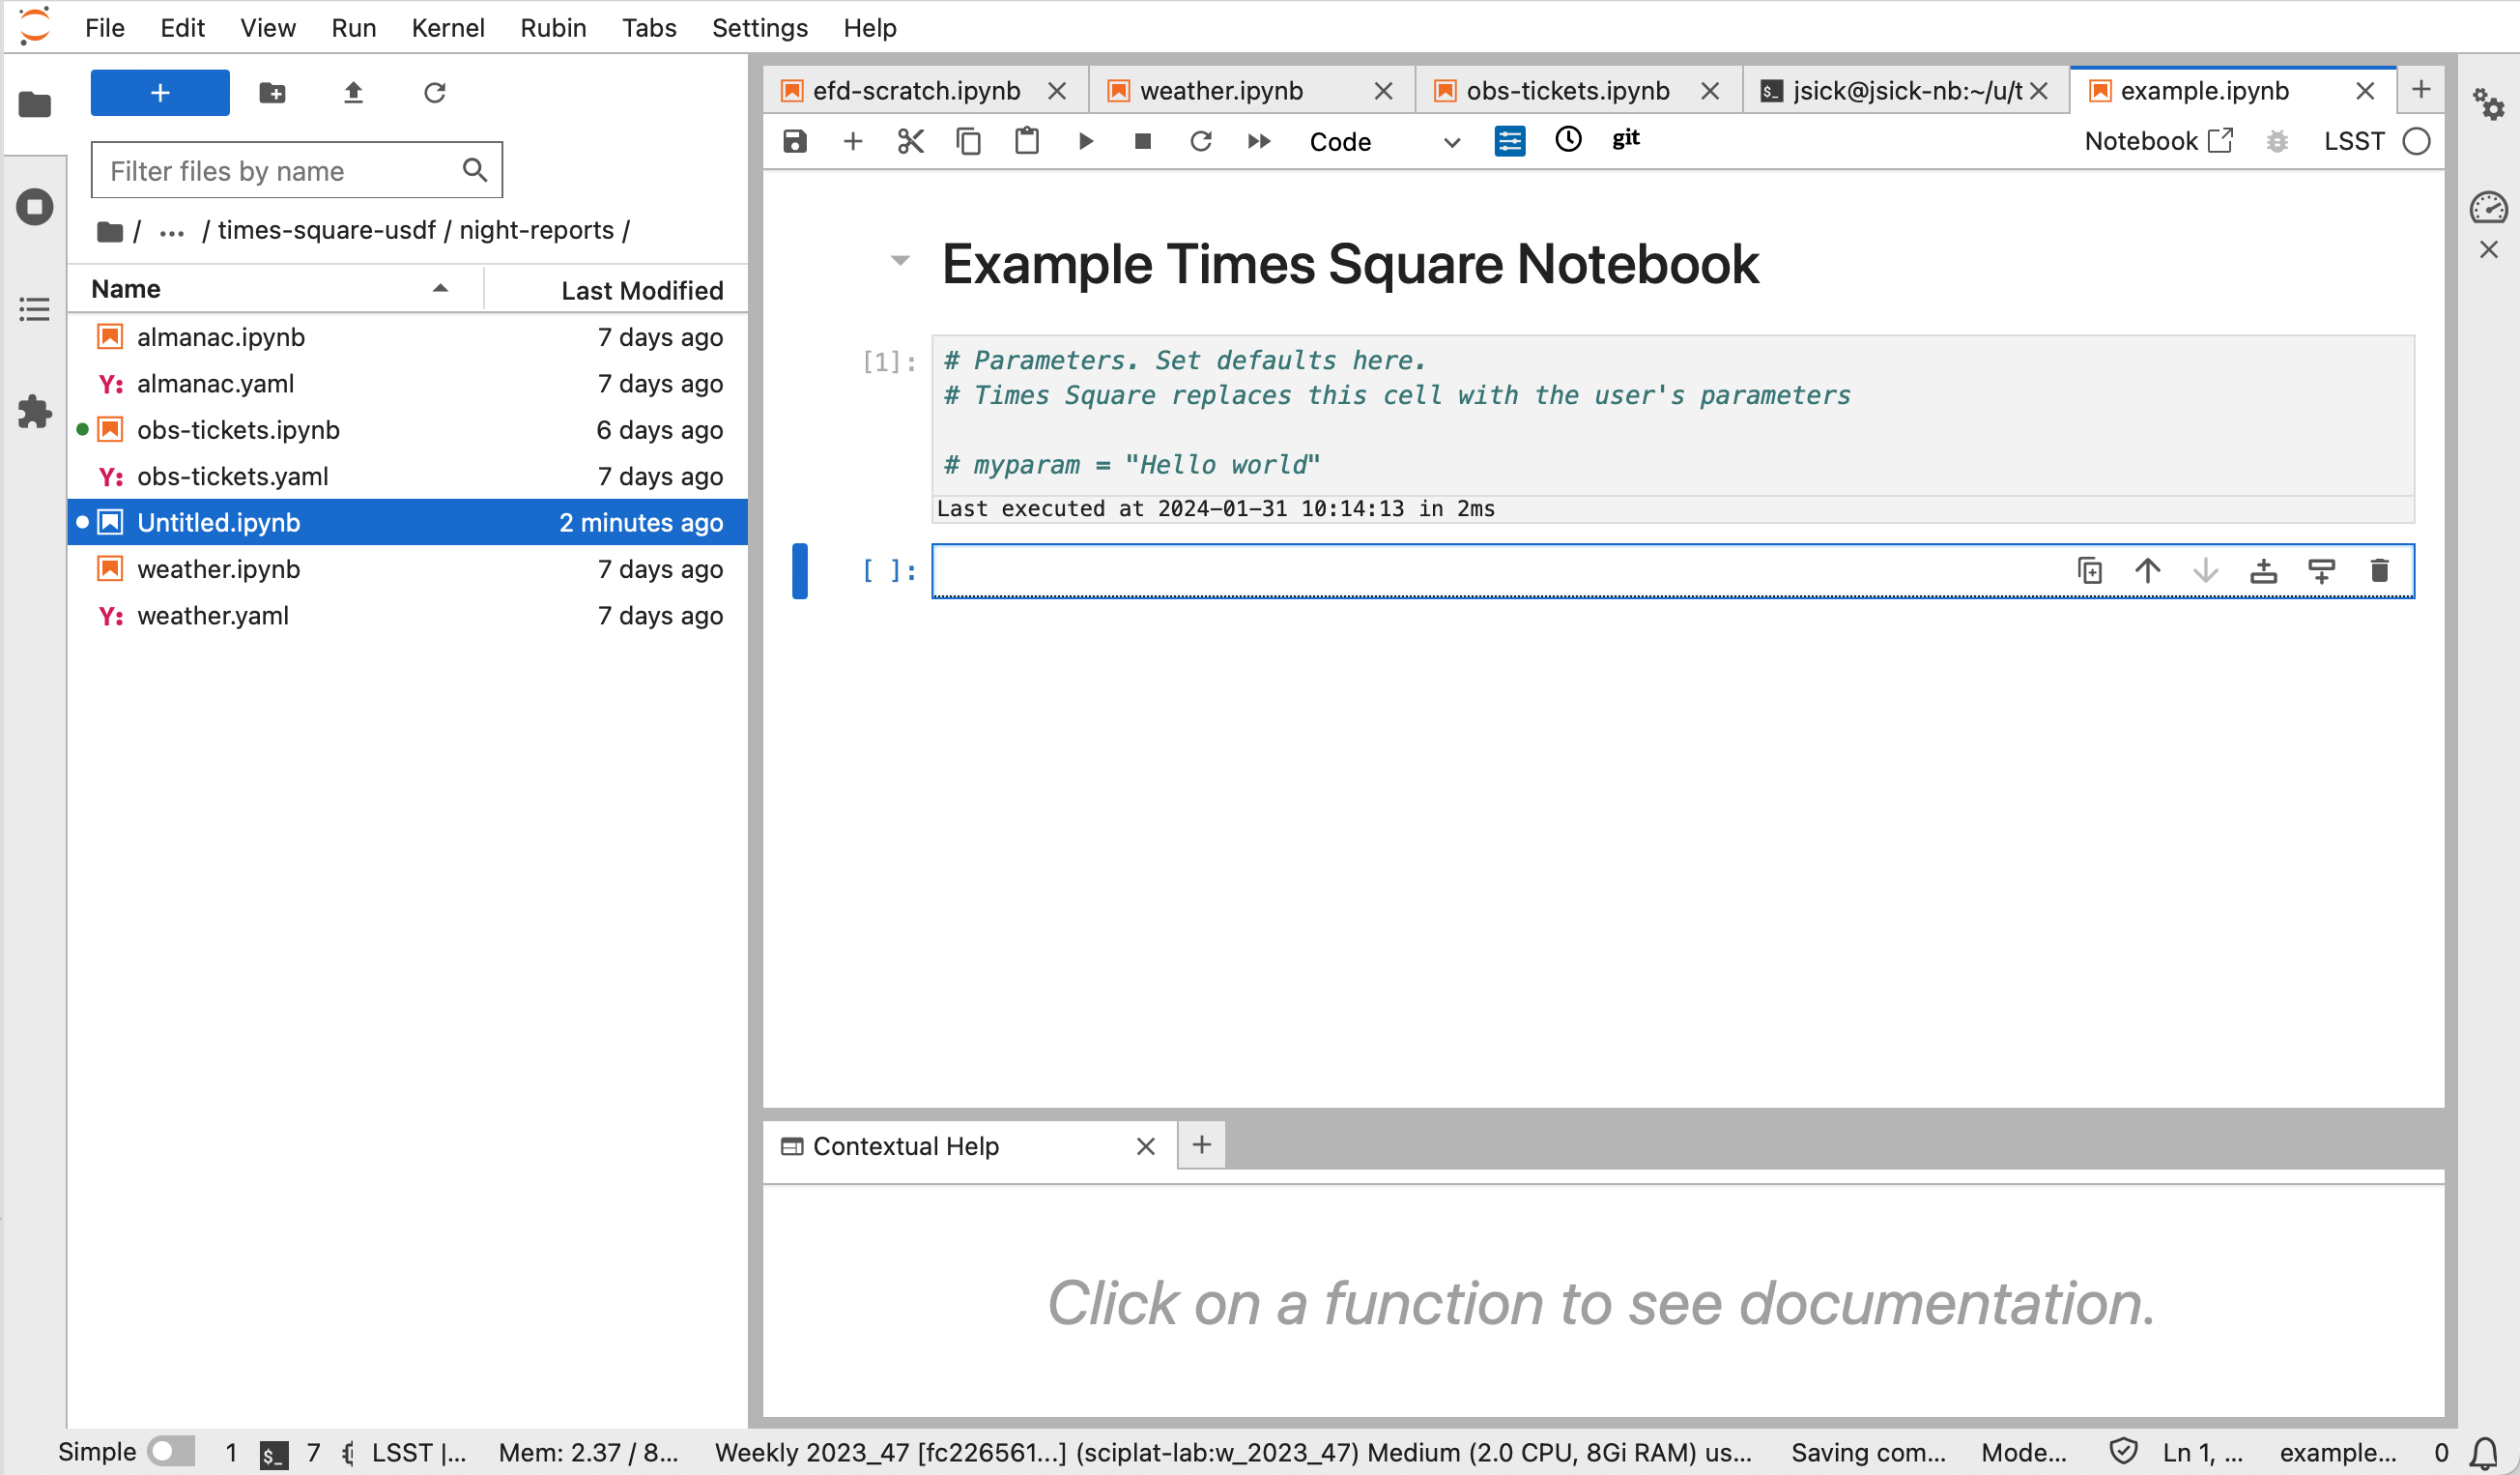
The beginnings of a notebook for Times Square. The first code cell, labeled [1] has a Python comment to remind authors that this cell is used by Times Square for setting parameters.
You can add Markdown prose cells before the parameters cell. This notebook has a Markdown cell with the notebook’s title.
5. Develop the notebook’s content
Now you can develop the notebook’s content as you would normally. Remember that in Times Square notebooks, the user will focus on the cell outputs. By default the code cells are hidden.
While writing the notebook, keep in mind the requirements that Times Square places on notebooks. For example, your notebook can’t access user-specific data or software and can’t do relative import of modules or data within the GitHub repository.
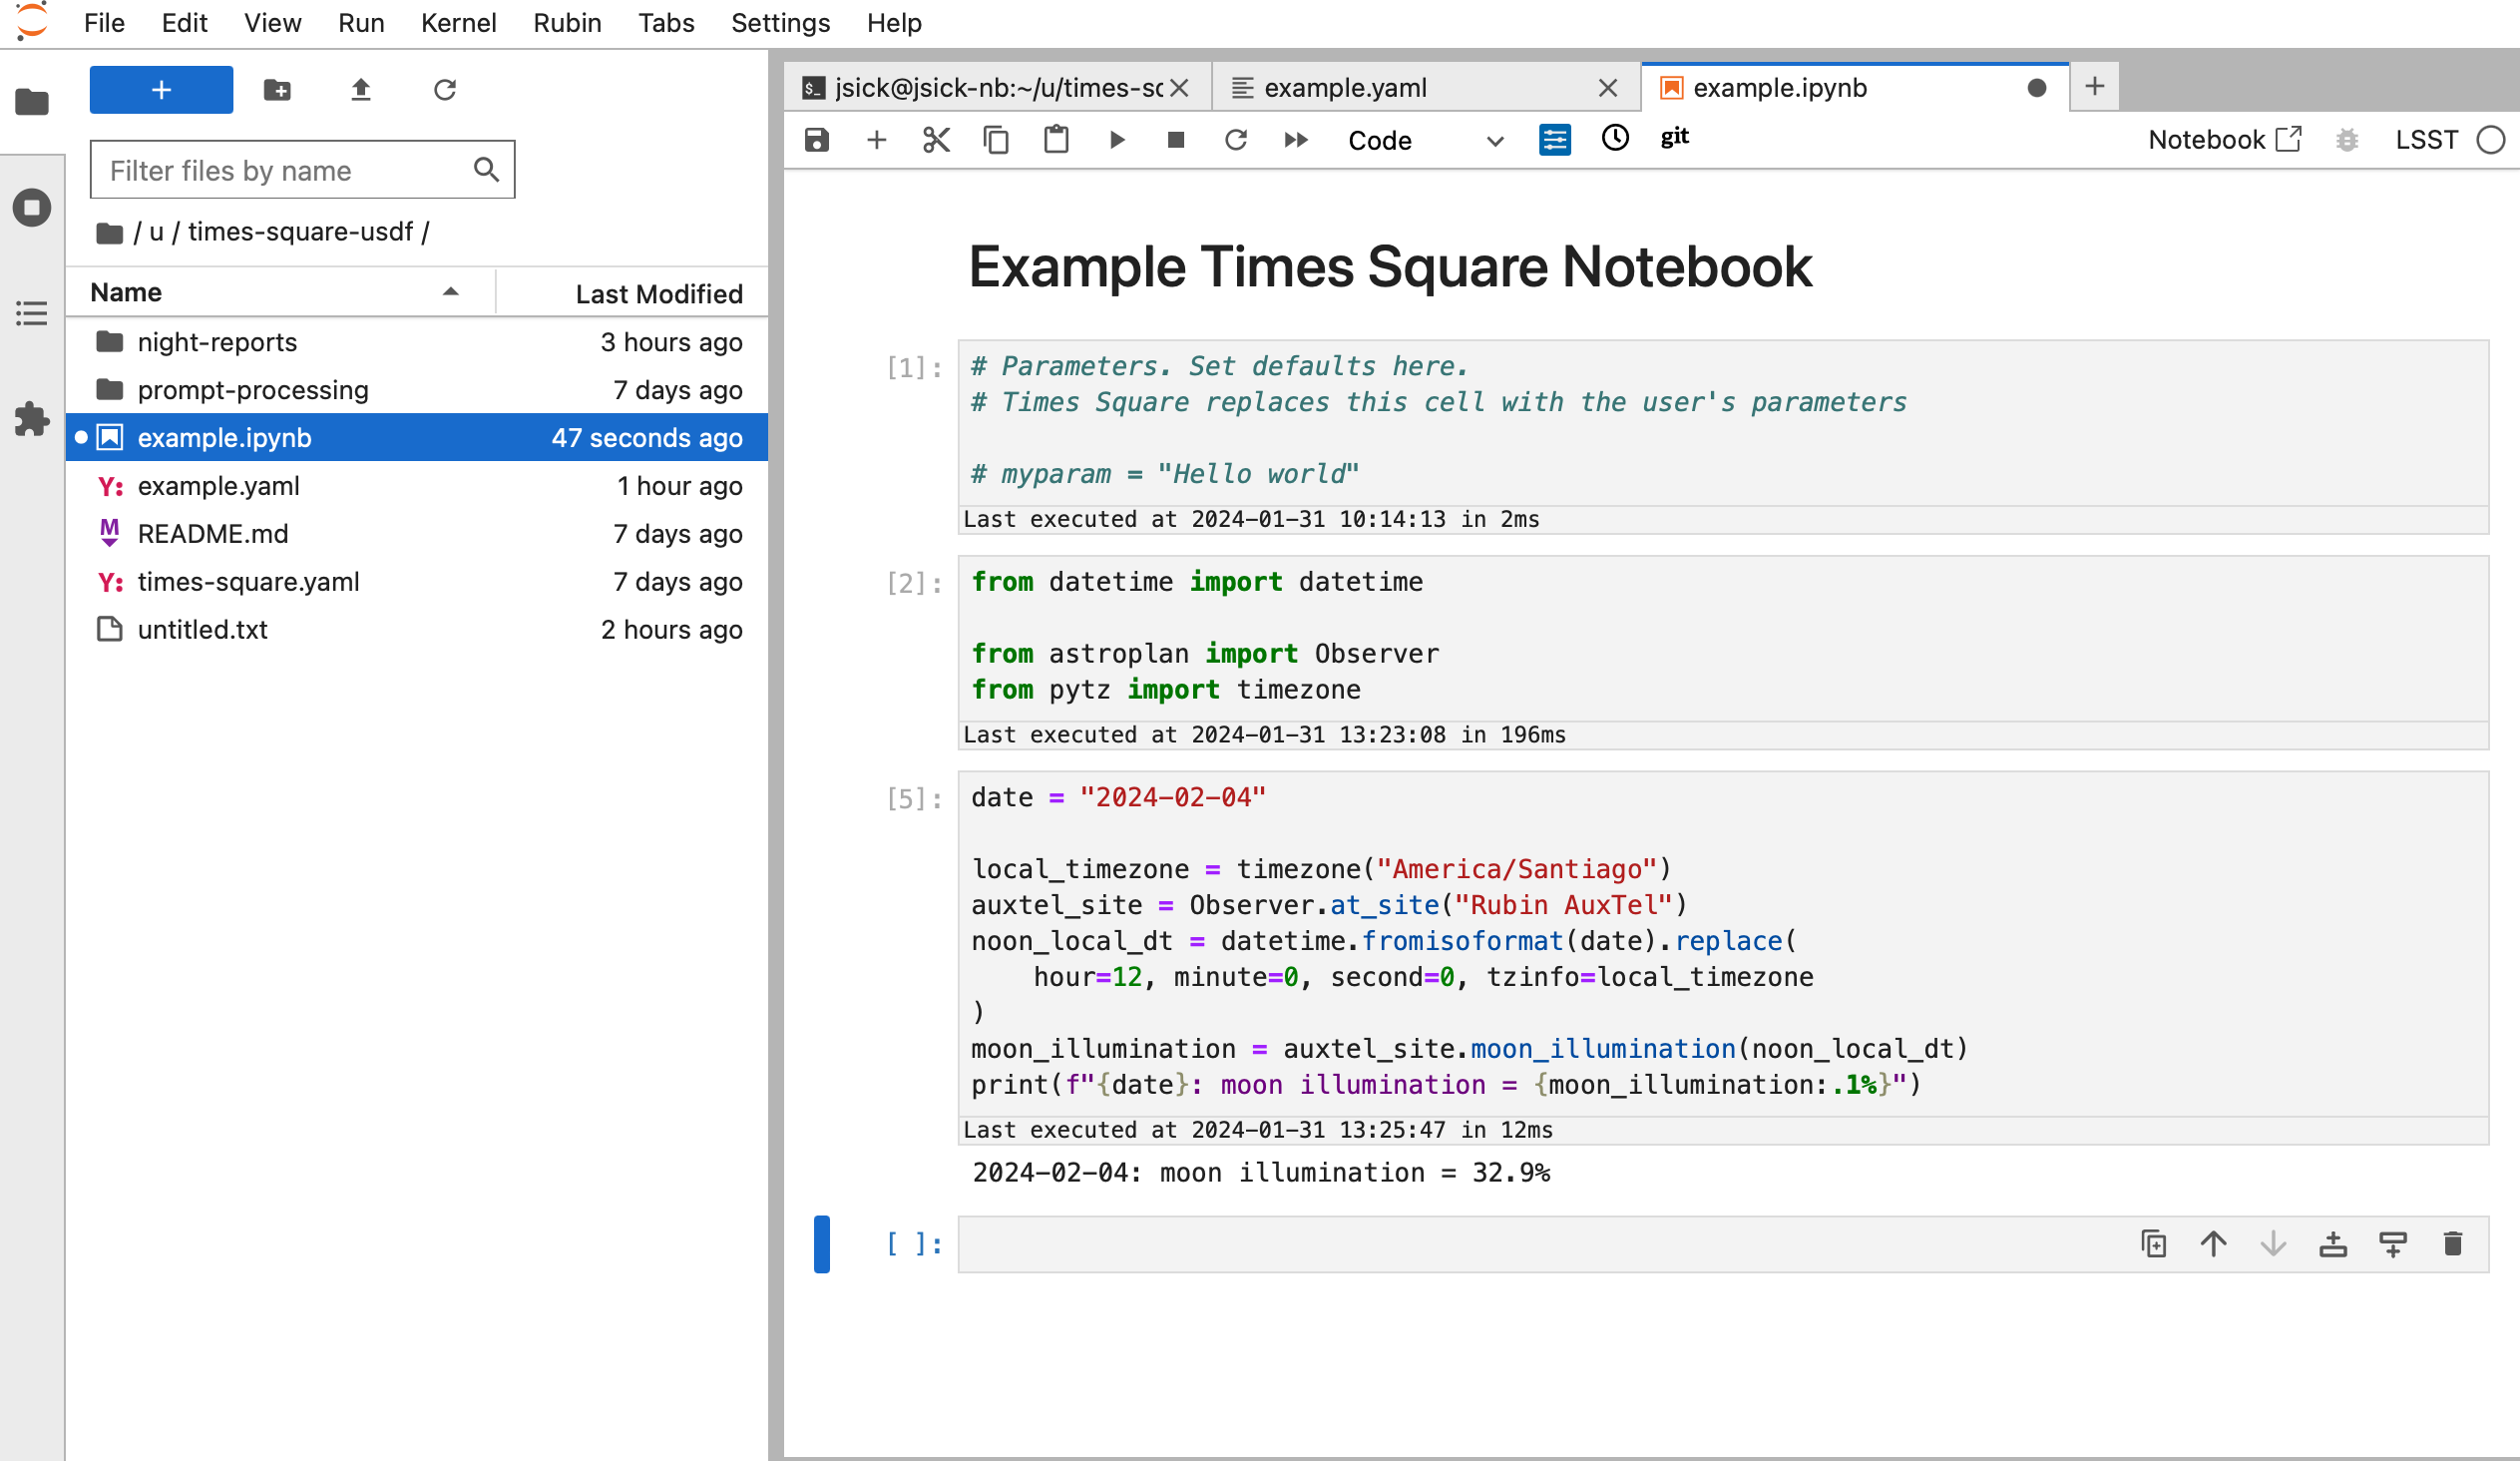
A notebook that computes the moon’s illumination and rise/set times on a given date using Astroplan. At this stage the notebook is functional, but it isn’t parameterized yet.
6. Parameterize the notebook
Parameters allow the user to set values that a notebook uses in its computations. In the example notebook above, there are two variables that are useful as parameters:
site: the name of the observatory site (in the Astropy database)date: the time when the moon illumination is computed
The general process for parameterizing a notebook is:
Add a variable to the parameters cell and assign a default value. The parameters cell is the first code cell in a notebook. The value of this variable can be a Python string, int, float, bool,
datetime.dateordatetime.datetime(see Parameter types). Don’t put any other code in this first cell because Times Square will replace it with code that sets the parameter variables when a user views the notebook.Edit the notebook to use that parameter variable (or variables).
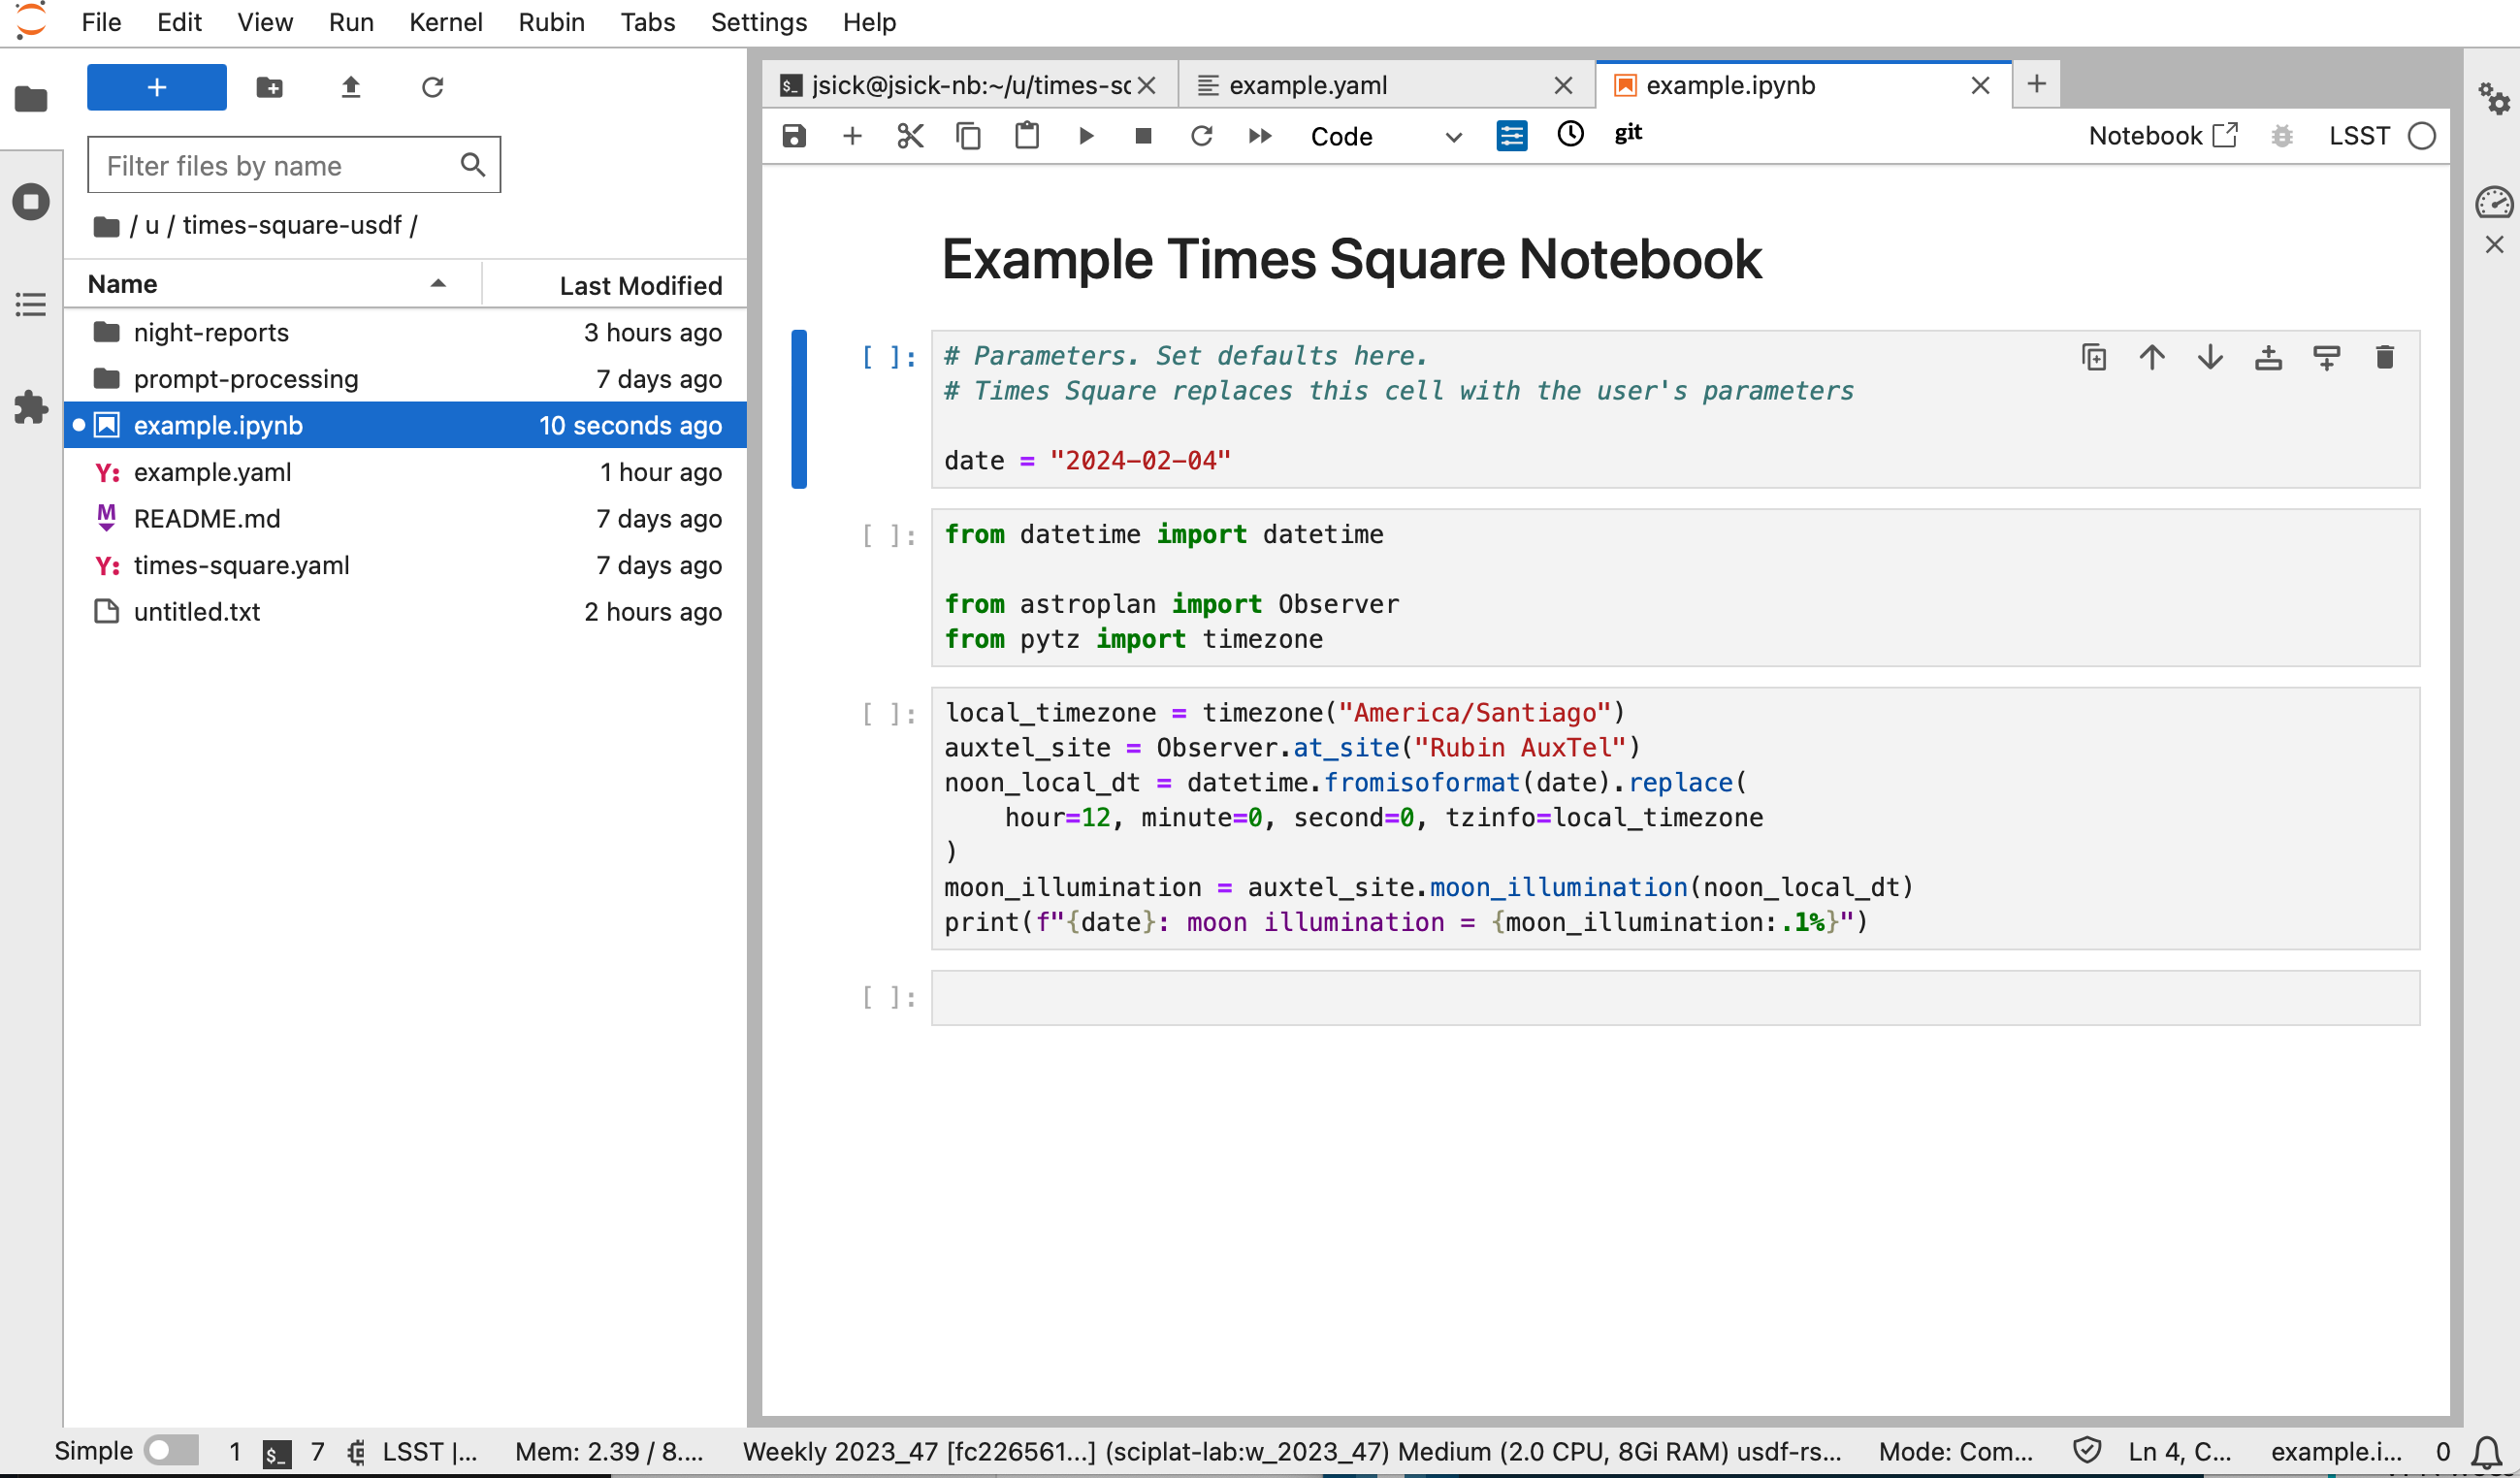
The completed notebook. The parameters cell has a date variable so that Times Square users can set the date when they view the notebook in the browser.
It also has a site variable for the observatory site’s name.
Tip
Notice that the parameters cell also includes the import of the datetime module.
This is because the date parameter is a date format, and Times Square automatically imports the datetime module for you to parse the date into a datetime.date object.
Likewise for a date-time parameter that is parsed into a datetime.datetime object.
7. Create a metadata sidecar file
The metadata sidecar is a YAML file that contains information about the notebook and its parameterization.
It always has the same path and name as the notebook, but with a .yaml extension.
This file always goes alongside its notebook, hence the term “sidecar.”
In the JupyterLab Launcher, create a new text file. Select to save the file with the same path and name as the notebook, but with a
.yamlextension.Alternatively you can edit the file with a terminal app like
vimoremacs:vim example.yamlPopulate the file with information about the title and parameters:
example.yaml¶title: Example description: Moon illumination at a site. authors: - name: Jonathan Sick slack: jsick parameters: site: type: string description: Name of an Astropy-registered site. default: "Rubin AuxTel" date: type: string format: date-time description: Time of observation. default: "2024-02-21T12:00-03:00"
See Sidecar metadata YAML file reference for more information about the sidecar file’s schema.
Save the file.
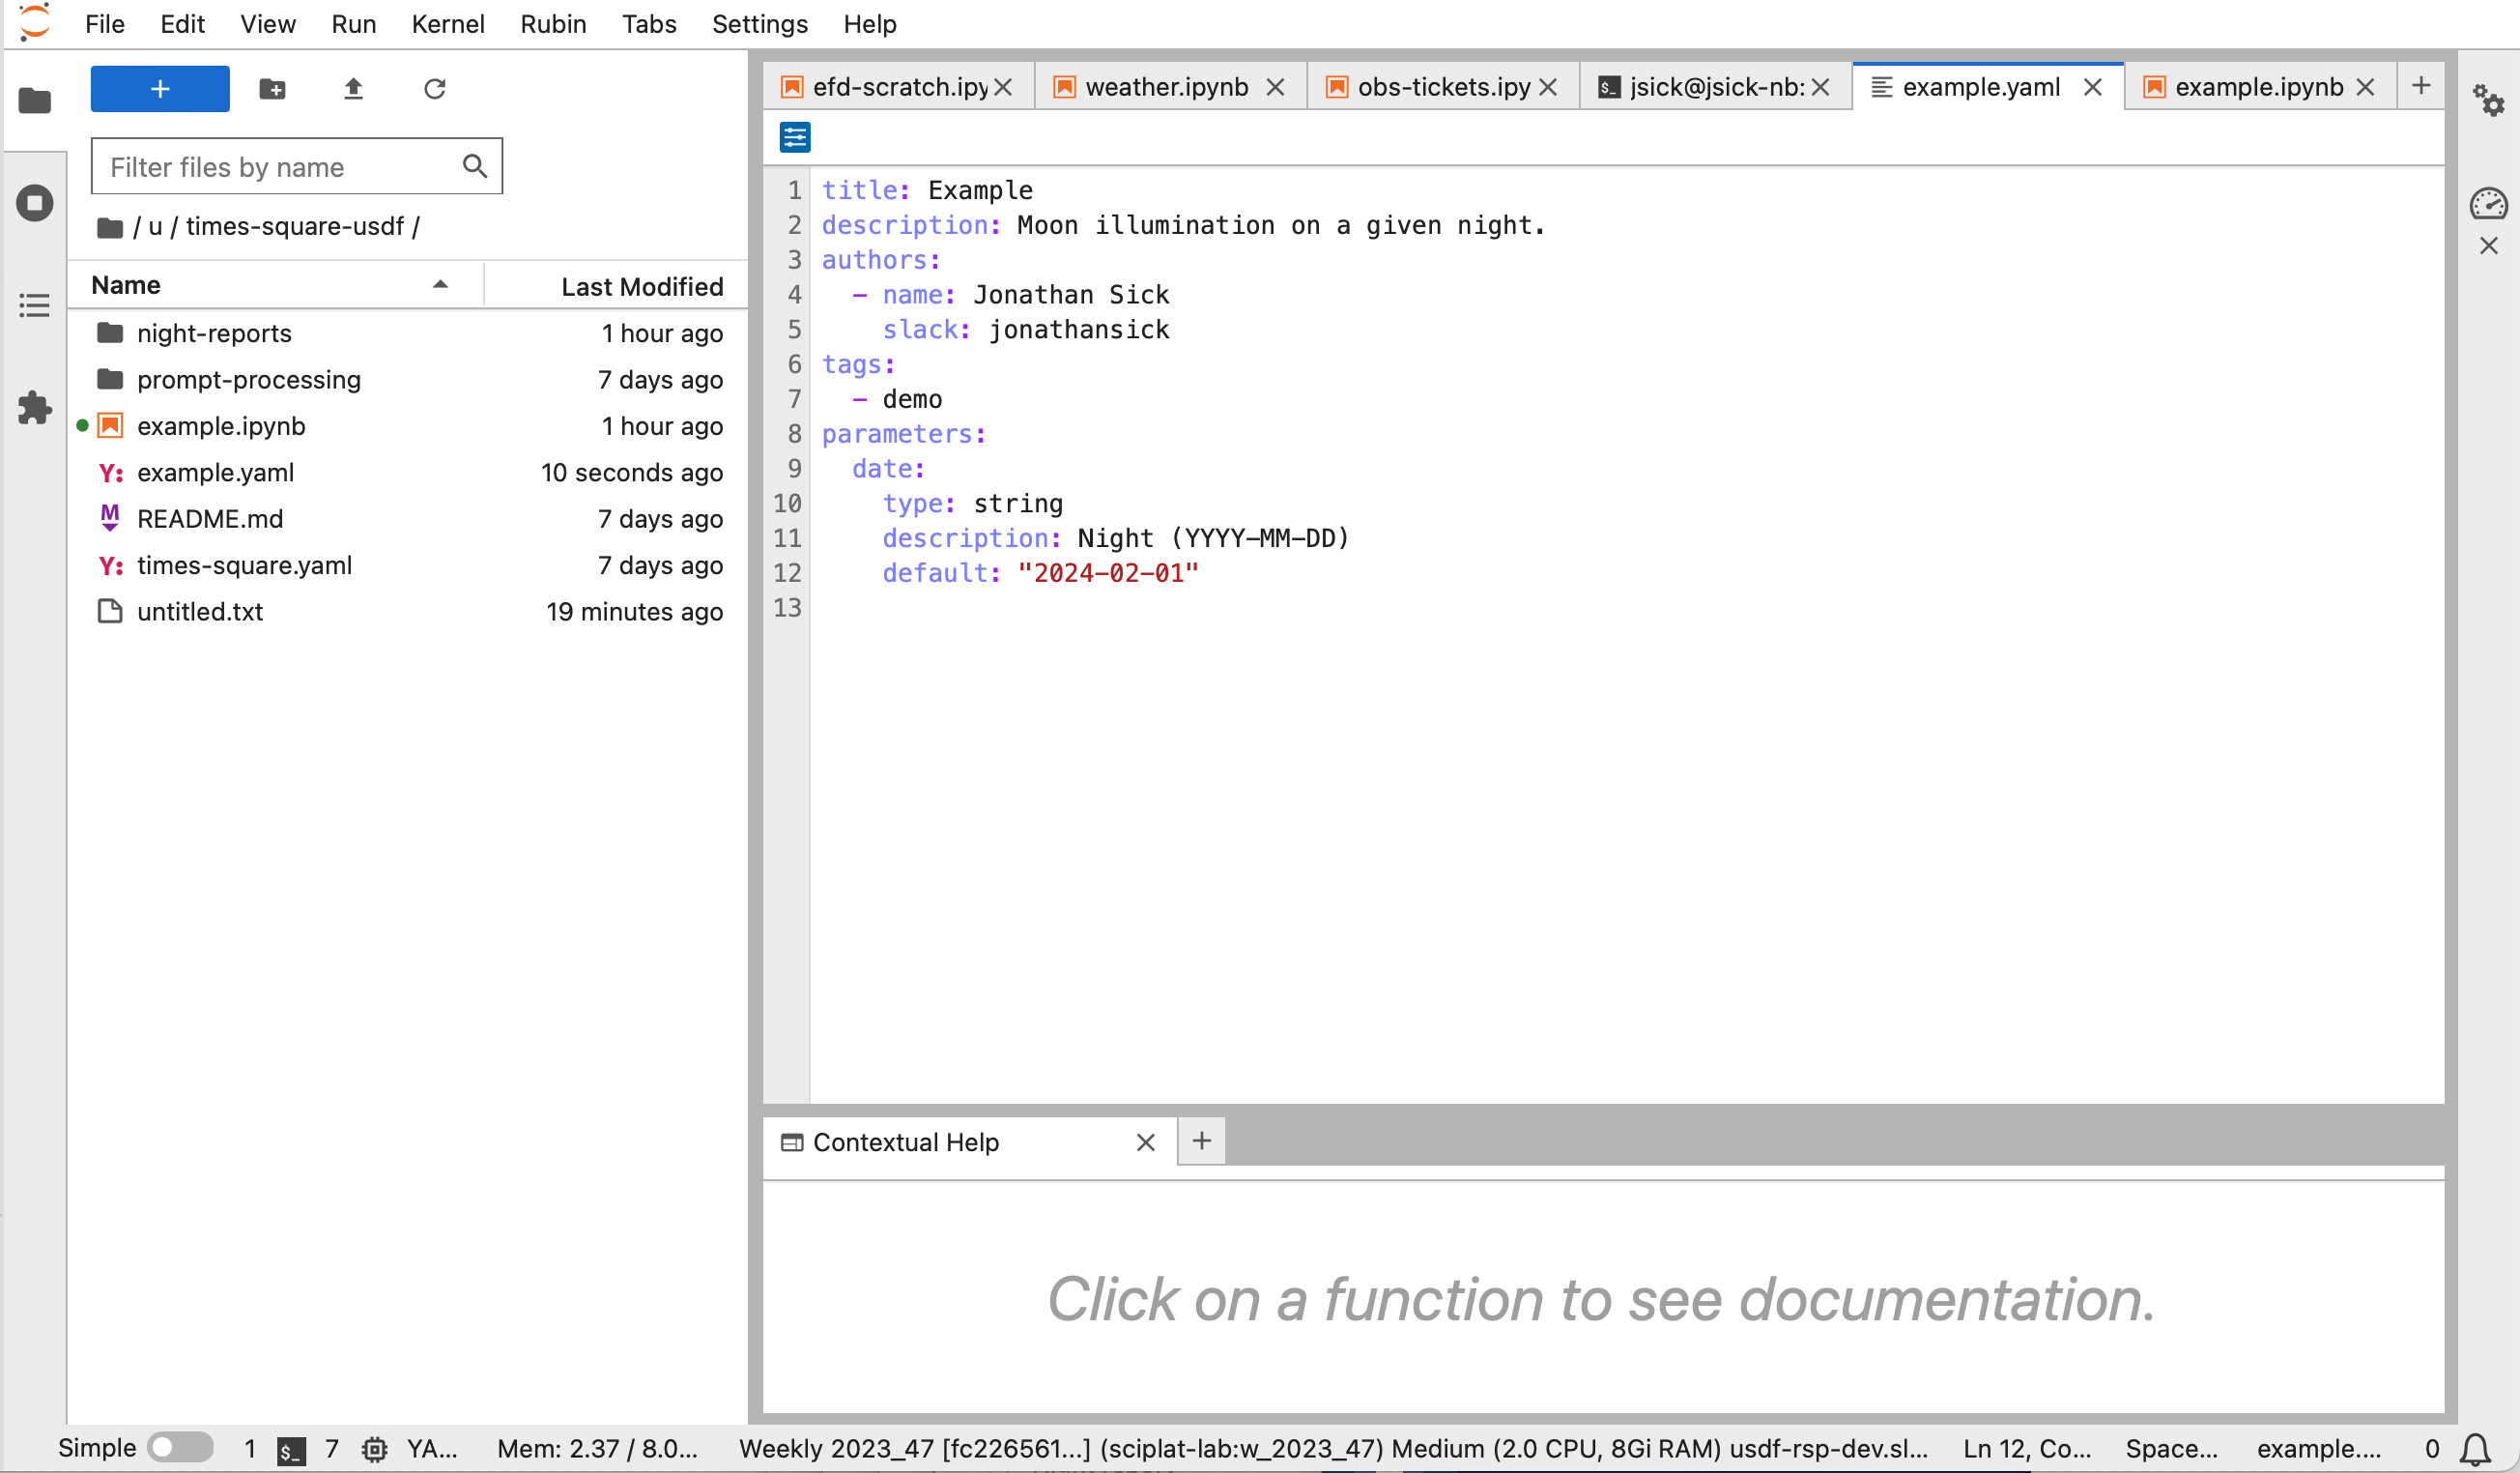
The metadata sidecar file for the example notebook in the JupyterLab file editor.
8. Commit and push the notebook to GitHub
Open a JupyterLab terminal and navigate to the repository:
Create a branch, if you haven’t already:
git switch -c tickets/EXAMPLEStage and commit both the notebook and metadata sidecar files:
git add example.ipynb example.yaml
git commit -m "Add example notebook"
Push the branch to GitHub:
git push -u origin tickets/EXAMPLE
9. Create a pull request
Create a Pull Request on GitHub that proposes to merge your branch into main (or the default branch, in general).
See the GitHub Pull Request documentation for more information.
10. Review the notebook on Times Square
While your pull request is open, Times Square will run the notebooks and check the formatting of the sidecar metadata files.
You can view the notebook on Times Square by click on the “Notebook execution” check towards the bottom of the pull request page and then click on the notebook’s name from the check run status.

A GitHub pull request in a Times Square repo. The highlighted status checks area contains important information, such as whether the YAML sidecar files are valid (YAML config validation) and whether the notebooks in the repo ran successfully (Notebook execution). Click on a check to see more details.
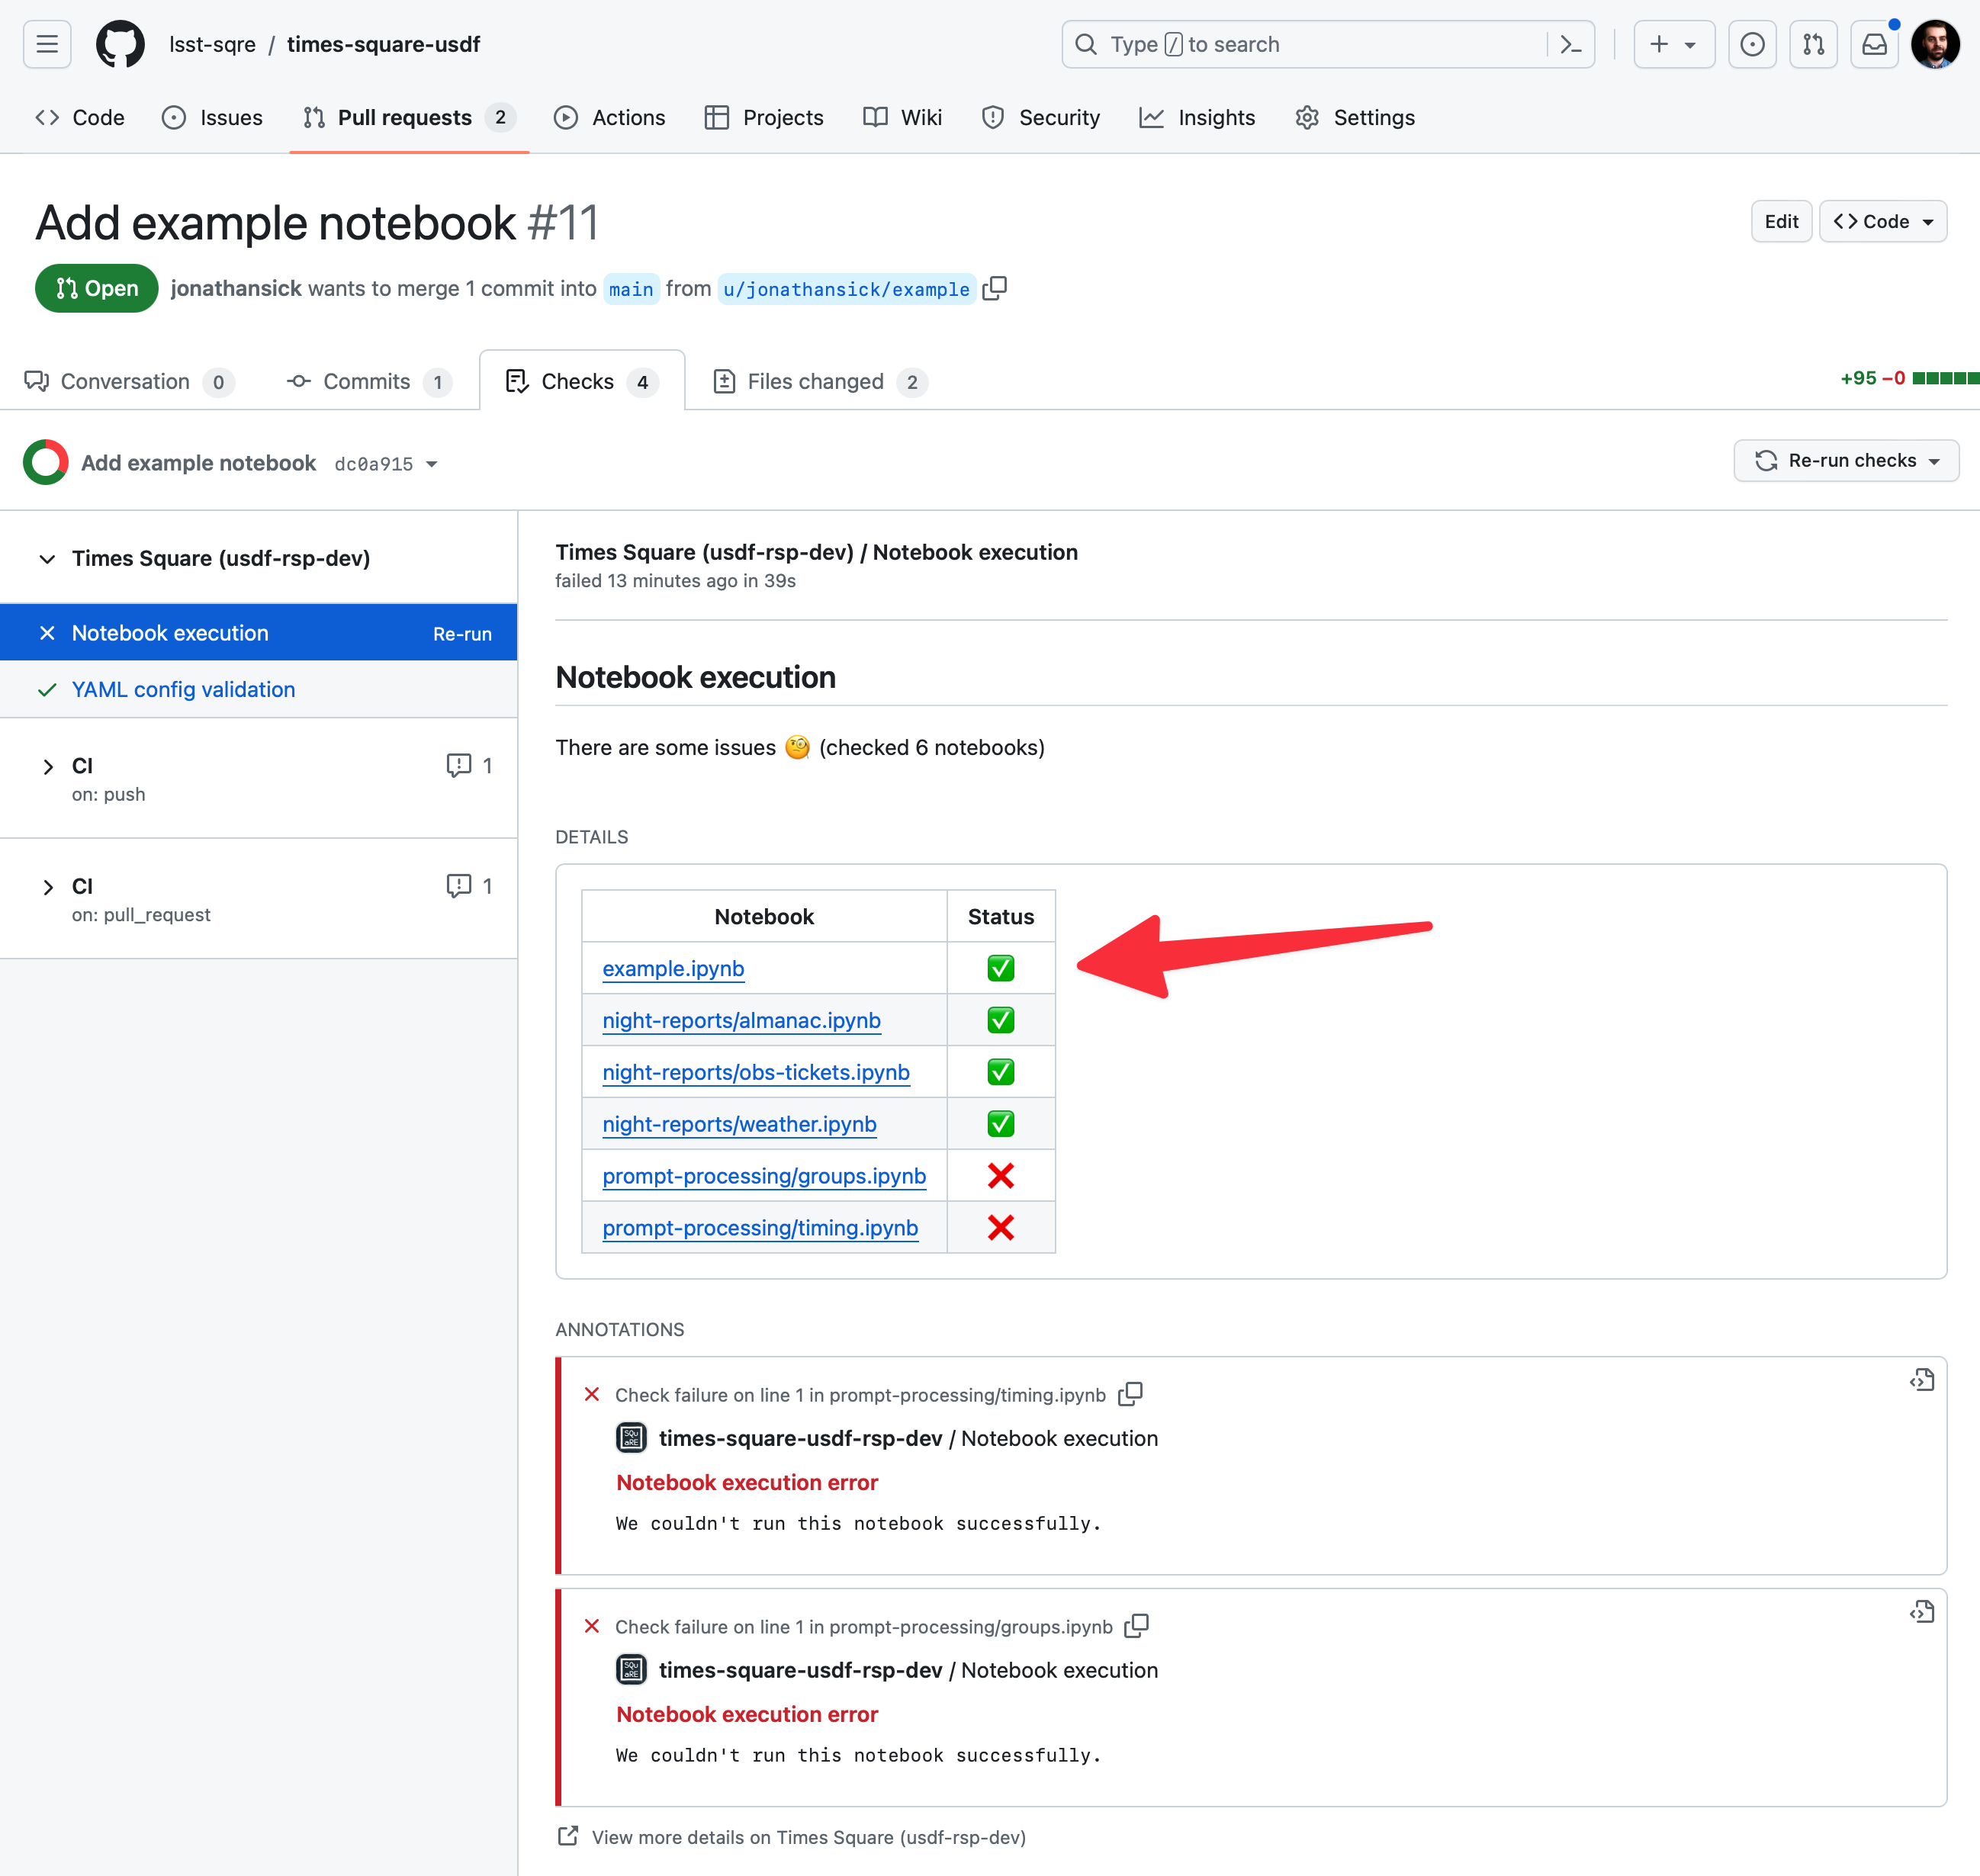
The details page for the “Notebook execution” status check. Click on the notebook’s name (highlighted with an arrow) to view it on Times Square.
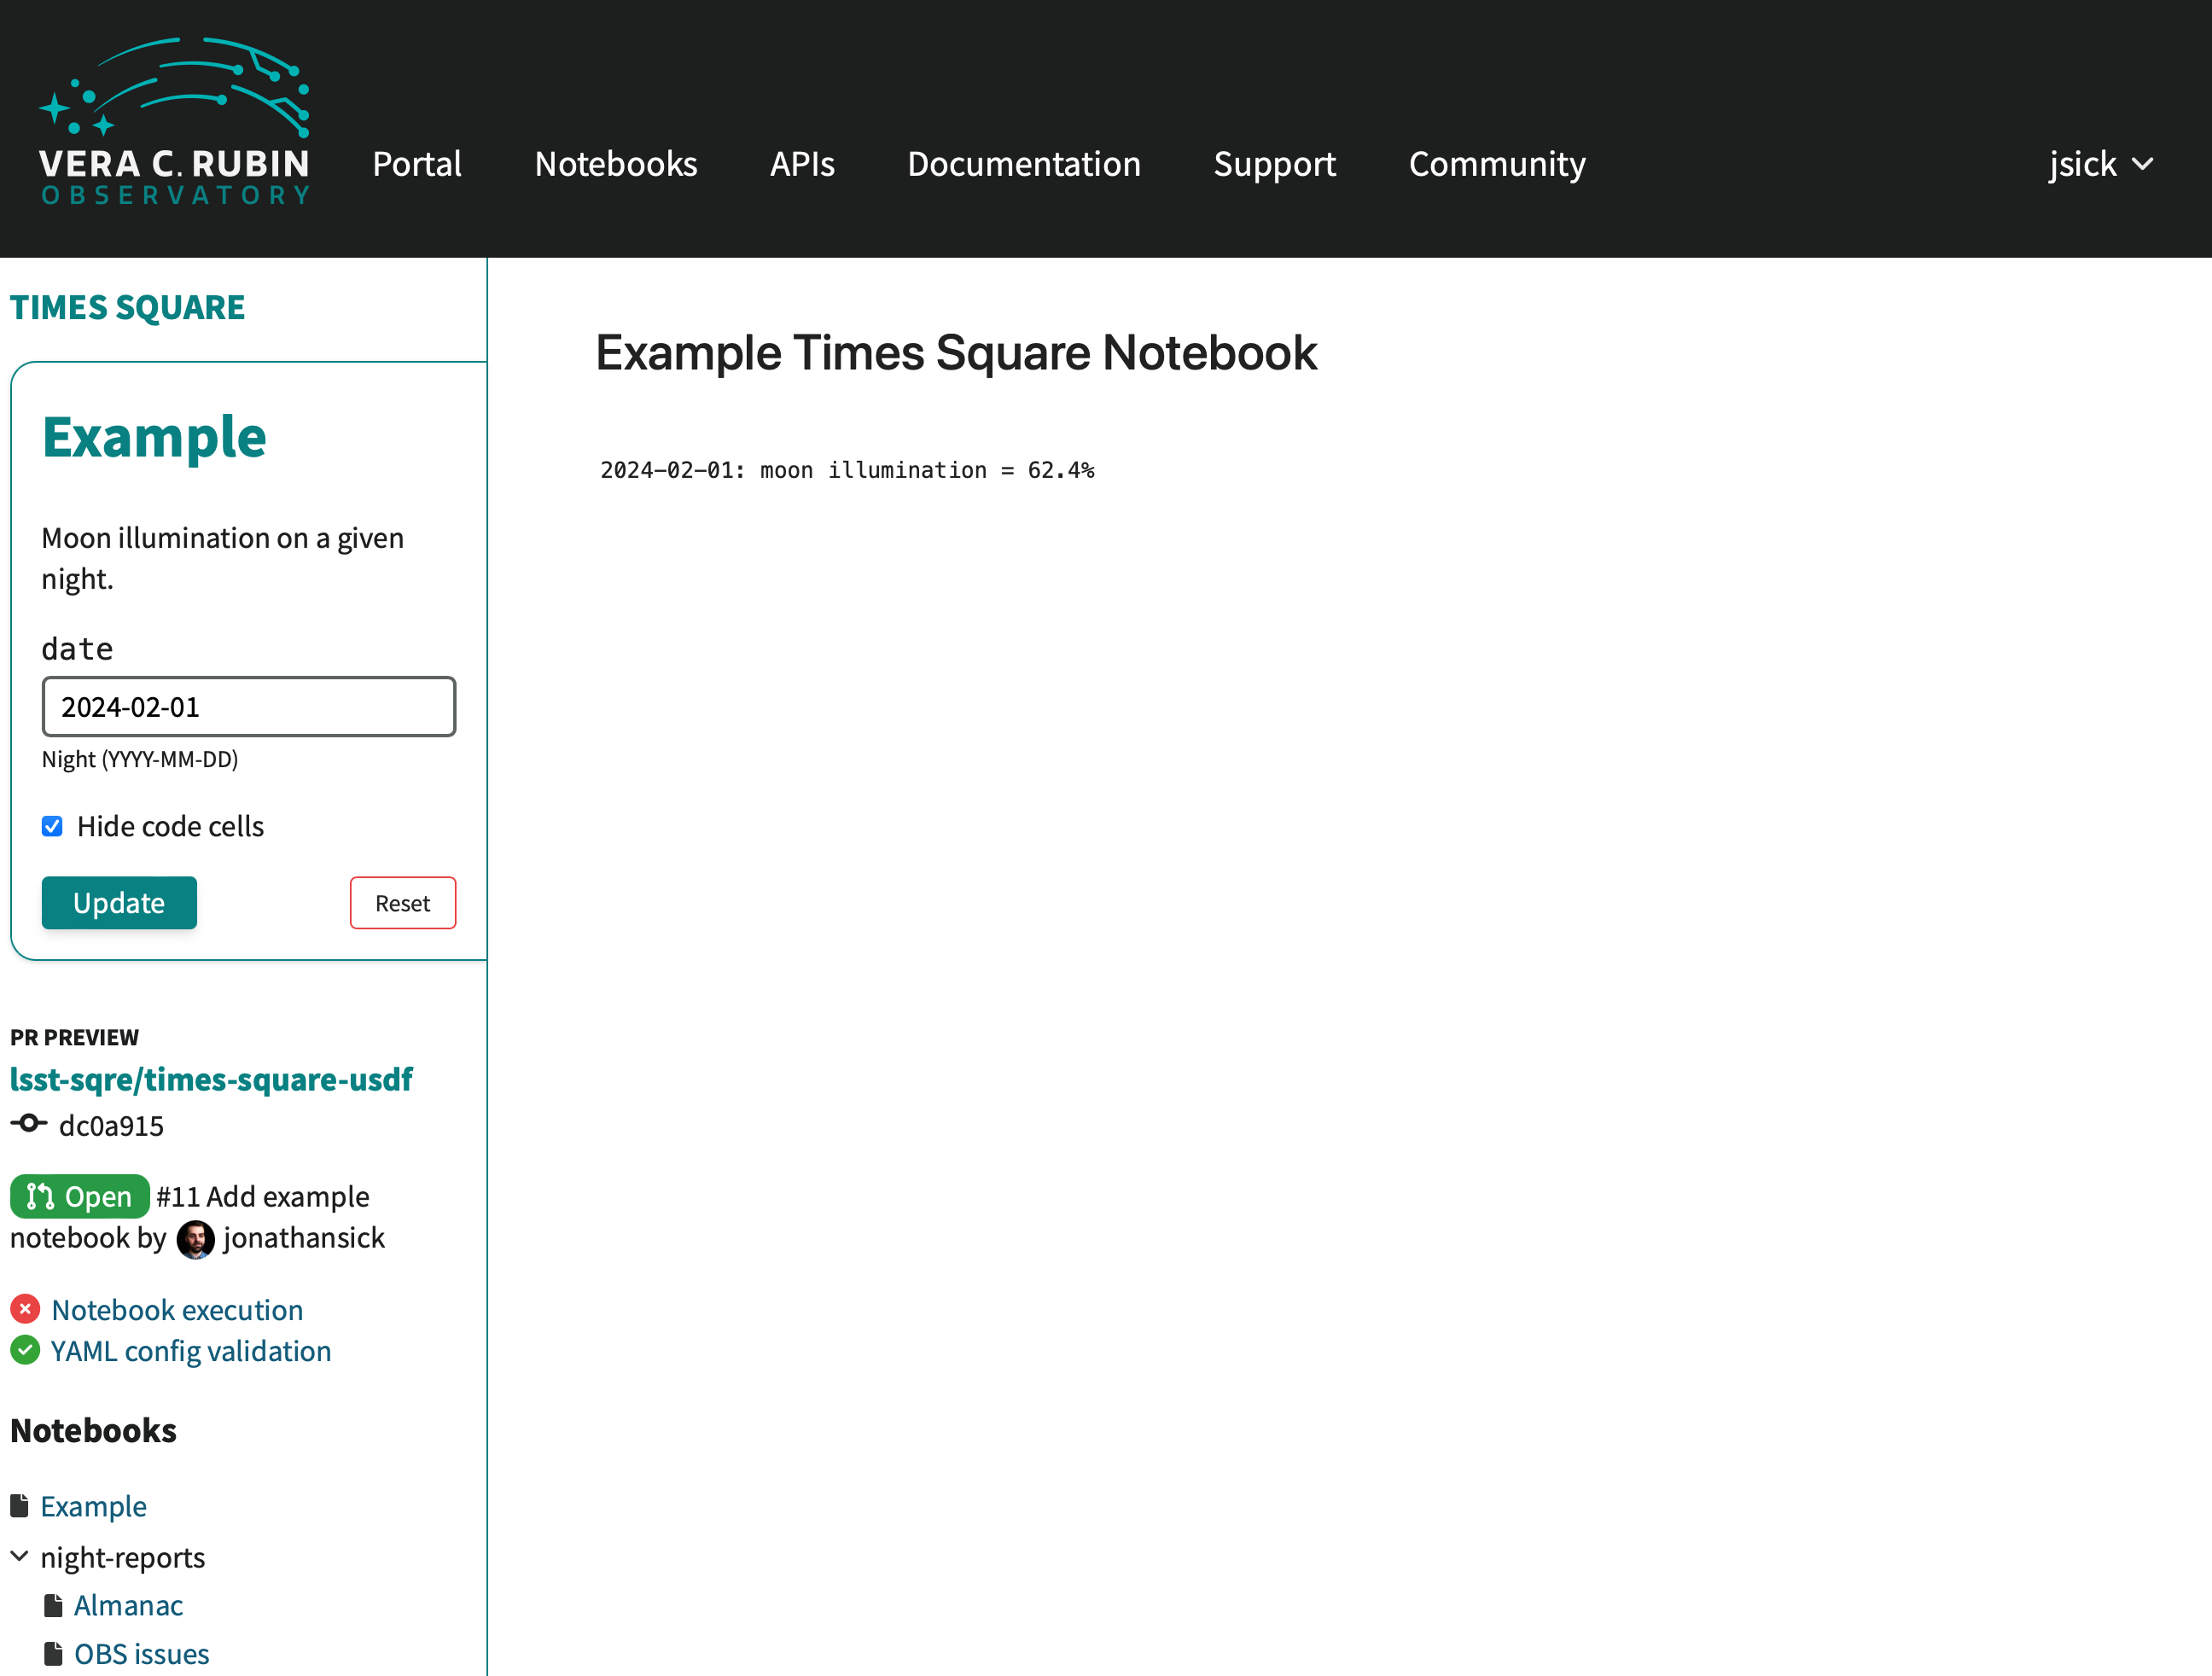
Previews of notebooks in the pull request. These pages are fully operable so you can test different parameterizations. You can get back to the GitHub pull request by clicking on its title in the left sidebar.
11. Merge the pull request
While your pull request is open, you can continue to make changes to the notebook and its metadata sidecar file. Whenever you push an update, Times Square will re-check and re-run the notebook. Therefore you can keep trying your notebook on Times Square until you’re satisfied with the results.
When you’re ready to merge the pull request, click the “Merge pull request” button on the pull request page. At this point, the notebook will be available from the Times Square homepage.